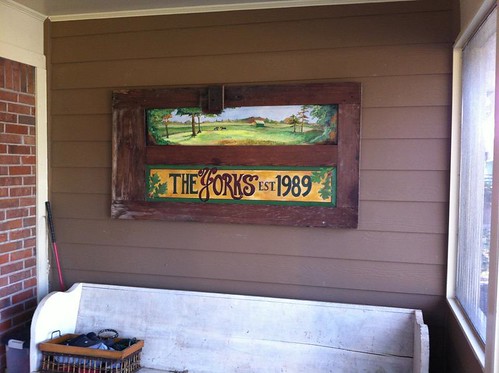
I have these 2, big, empty walls in my dining room. The room itself is only large enough for the table and chairs, or I would put a side board or hutch or something there. My sister-in-law got me thinking outside the box last Christmas when we went to her house and she had just hung an old, antique door on the wall of their outside patio. A friend of hers painted the picture above on the door and I thought it was just beautiful! And something like that would be perfect for my dining room.
So I went on a search to find the perfect door. I’m not much of a shopper of antique stores, but I do love to find a good bargain online, so that’s where I started. Unfortunately, most of what I found was out of state, and even if the price was decent, the shipping was crazy! I got a bit discouraged until I was on Instagram one day and saw something else I liked. It was an old window this time. Painted into a chalk board/picture frame. Very cute! And even though it wouldn’t be large enough for the long wall, it would be just the right size for the other one.
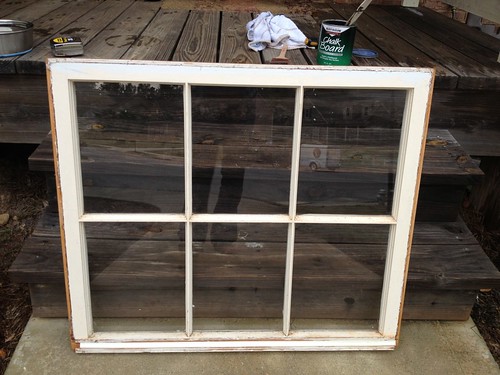
As luck would have it, my parents replaced the windows in their garage this summer and they were giving the old ones away. The first thing I did was wash and scrub, wash and scrub, wash and scrub until I felt like all the nasty garage-ness had been removed. Then I sanded them down and hosed them off once more.
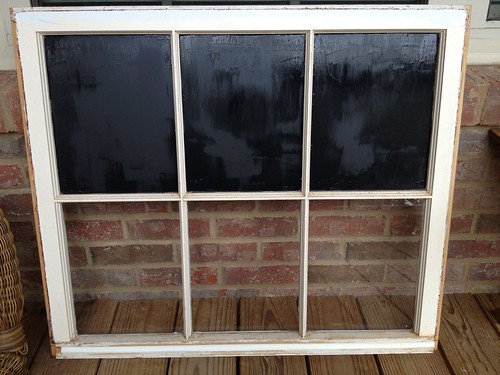
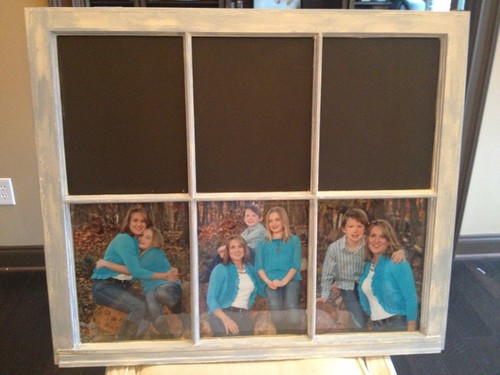
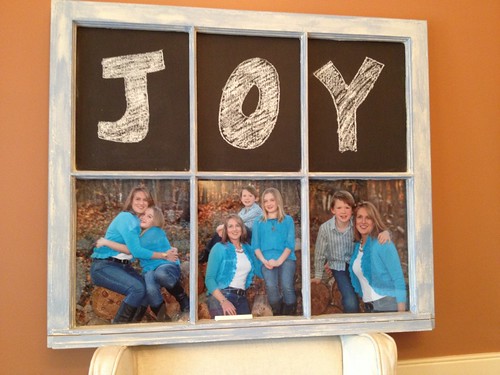
I had to decide which side I wanted to paint as the chalk board. Windows are not identical on the front and back. I thought it would be nice to have a little ledge to put the chalk on when it wasn’t being used, so that’s how I made my decision. I had some old chalk board paint from when we painted the kids’ playroom when Savannah was 2 and Emery was still in utero. I wasn’t sure if it had gone bad, but thought it was worth a try. It ended up taking 3 coats to cover, but it turned out just fine, so I’m guessing it’s still good!
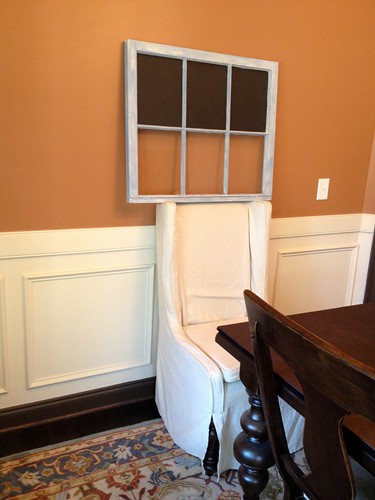
Next I painted the frame portion. (I don’t suppose it matters if you paint the chalk board or the frame first, I just know I’m not the neatest painter in the world, so I was able to cover any paint splatter on the frame just once instead of having to go back and touch it up.) I knew I wanted the final product to be a sort of white-wash-blue color, but first I had to give the window a fresh coat of paint. I had some of the dining room trim paint in the basement, so I went with that. After it dried, I applied the blue. But not with a paint brush. I dipped a rag into the paint and rubbed it on. That’s how I got what I call the “white wash” look.
The only thing left to do was take some pictures for the bottom portion. On Thanksgiving, I was taking snapshots of the kids and my sister offered to take a few of the kids and me. Normally I do not put pictures of myself up around the house. I don’t know why. It’s just strange to hang pictures of yourself… and I’m so critical, I rarely have a picture I like well enough anyways!
The picture part of this whole thing was the trickiest. The window panes are not the same size as prints can be ordered in. I had the choice of either ordering 8×10 prints, which would have been too small (this would have been okay… I could have left it where you could see the wall behind it), or the way I ended up doing it was to order 16×20 prints, and crop them down. The original Instagram picture actually didn’t have the prints behind the glass. She had put snapshots in various positions attached to the front. I also saw some ideas that included corkboard over the panes and one lady took a couple of the panes out and put chicken wire in, then she attached little notes and such with tiny clothes pins. Also very cute, but way too much work for me!
Once I finished my project I realized I didn’t have any chalk. A few days later we were out running errands so I picked some up and came home to see how the chalk board worked. And guess what? It does! Yay!!! The last thing I have to do is put something on the back so I can hang it up. I talked to a woman who has framed prints for me in the past and she has offered to do this for me. I’m taking it to her next week, so hopefully I’ll have this thing hung by Christmas! It’s like a gift for myself!
One Comment
Sigh…now to find a window like that and I’ll get to work :)
Thank you for the “tutorial”!!!